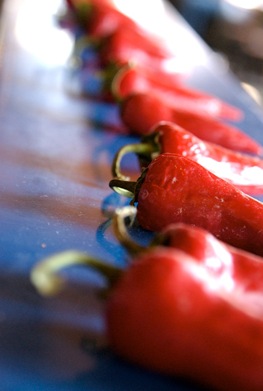
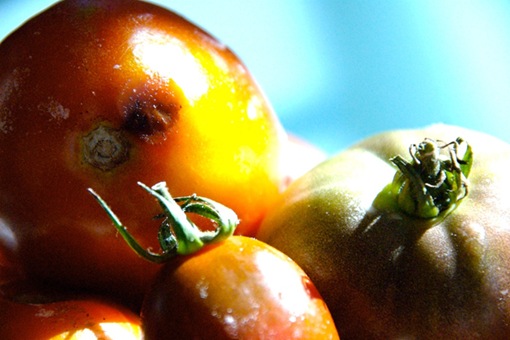
Italian Apple and Fennel Salad with Olive Oil and Parmesan

•November 20, 2007 • 1 Comment

Serves 4-6

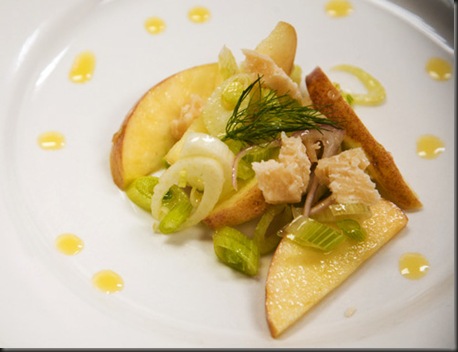
 Photo by Erinn, taken during a cooking class I taught with Seattle Tilth.


I first discovered fennel while I was studying in Parma, Italy. The strange white onion-like bulb that my mother had never cooked or liked (or maybe even tried) was in every nonna’s market basket, braised on every plate, or shredded in every salad. This recipe is a version of my favorite, and simplest, of those salads with the only difference being the substitution of seasonal crisp northwest apples in place of the Spanish and Moroccan oranges that flooded the Italian markets in winter.

I medium fennel bulb, tough outer layers removed

1-2 firm sweet-tart apples, such as Fugi or Granny Smith

½-1 lemon to taste

Best Quality Olive Oil, preferably with a peppery undertone

Crumbled Fresh Parmesan Cheese, preferably aged 2 years (Parmagiano Reggiano in Italian)

Sea Salt & Fresh Ground Pepper

This salad is best made at the last minute since both apples and fennel oxidize quickly, loosing flavor and gaining a unsightly brown color—but since this salad is so simple to prepare and good to eat that has never been a problem for me.

Begin by slicing the green stalk off of the fennel bulb. Save a few sprigs of the lacy fennel leaves for decoration and discard the rest. Using a sharp knife, or a mandolin if you have one, slice the remaining bulb into thin slices, roughly 1/4-1/8th of an inch thick. Place the sliced fennel in a bowl and immediately cover with lemon an olive oil to prevent oxidation. Slice your apple(s) into thin wedges, keeping the skin for color and crunch, and add them to the fennel mixture. Top with a generous drizzle of olive oil, salt & pepper, and crumbled Parmesan.

I like to plate this salad individually and serve it as a starter. However you choose to use it, an individual presentation shows off the delicate shape and color of the fennel, olive oil, apples (or oranges if you substitute them) and cheese.

In a simple dish like this, the quality of each ingredient is extremely important. If you are new to olive oils there are several pointers that can help you distinguish producers that cater to an educated consumer. Firstly, you only want extra virgin. Secondly, pick bottles that at packaged in dark glass bottles or opaque container: olive oil degrades with light and dark or opaque containers preserve the freshness of the product. (Another trick is to wrap the bottle in tin foil once you get home.) Thirdly, look for a percent acidity on the back of the bottle: the lower the better as this measures the amount of undesirable fermentation that occurred before the olives were pressed and after the oil was sealed. And finally, look for oils that are from a dated harvest and pick the oils whose harvest date is closes to the most recent November. Olive oils DO NOT improve with age, and you always want the oil most recently pressed. Once you find an oil you really like, reserve this oil as a finishing oil ( an oil applied after cooking is done for flavor and color) since heat will degrade the properties you have so carefully selected it for.

As for the Parmagiano, it is important to use the real thing, and if you cannot find it, the closer the better. Costo owns the import rights on real Italian Parmagiano, and the best prices so that is where I buy mine. Otherwise better groceries almost always carry the cheese. Simply crumble the cheese by breaking it up with a fork.

Roasted Fig and Black Pepper Biscotti

•September 26, 2007 • 4 Comments

Figs2

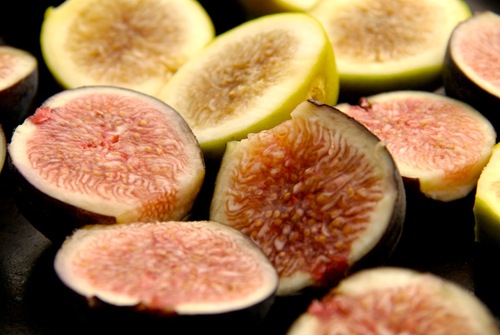
Thursday morning I arrived to find a case of figs in the middle of my station, bruised and soft, probably a gift from Frank’s.

I cut one open and took a bite. They were all sweetness, simple, pure, and boring.

TIM. DID YOU WANT SOME FIGS? I was anxious to get rid of them and onto my long prep-list.

Tim stopped slicing onions and shook his head.

WHAT ARE YOU GOING TO MAKE TODAY? He hopes it is going to be canolli.

I looked at the pile of fruit in front of me, not sure what I was going to do.

SOMETHING WITH THESE FIGS, I GUESS. MAYBE A PUREE.

He rolled his shoulders and continued slicing.

Tim is one of the thinkingist chefs I have worked with. Fightingly creative and intuitive.

Fig Puree is neither. I turned to the figs, cut them in half, and put them on a lightly oiled sheet pan.

LAUREN.

YEAH? I was just closing the oven doors.

SOMETIMES YOU HAVE TO PUSH. YOURSELF. THE CUSTOMERS.

He pauses between each word and then goes to the stove and stirs his stocks.

I thought for a moment. WHAT DO YOU THINK ABOUT A BISCOTTI WITH BLACK PEPPER TO BALANCE THE SWEETNESS?

He smiles a little, like what he’s about to say is a dare.

IT SOUNDS GOOD TO ME.

Roasted Fig and Black Pepper Biscotti

Roasted Fig and Black Pepper Biscotti

These biscotti a reminiscent of Fig Newtons, but with a subtle kick. They make an excellent light dessert pared with a Vin Santo, or other sweet wine.

Biscotti are simple to make. In Italian ‘bis’ means twice and ‘cotto,’ cooked, making biscotti, literally ‘twice baked’ cookies. On a day to day basis I make Orange Almond and Chocolate Hazelnut Biscotti, both of which share the same base recipe as Roasted Fig and Pepper Biscotti.

 Basic Biscotti Recipe

This base recipe, which I adapted from one I found on the side of a Bob’ Red Mill flour bag, is better the day after it is made. Once the cookies are completely cooled and have a few hours to dry out they gain a nice snap. I love that because they are one of the few things I can get ahead on without sacrificing quality.

1 1/2 cups unbleached flour

1/4 tsp salt

1 1/2 tsp baking powder

2 tbs unsalted butter

1/2 cup sugar

1/4 cup honey, warmed

1 egg, room temperature

1 tsp Vanilla

Shaping, wet hands, double baking.

Preheat oven to 350 degrees.

Cream the sugar and butter until light and fluffy. Add the warmed honey, egg and vanilla. Sift flour, salt and baking soda together and gently fold the mixture into the wet ingredients.

Turn the dough onto a lightly floured surface. With damp hands (to prevent sticking) press the dough together and then separate it into two equal balls. Gently roll these balls into 8” logs and place on well oiled or silicone mat lined baking sheet. If you do any baking at all I strongly recommend purchasing a silicone mat.

Again moisten your fingers and flatten the logs into 11/2” high loaves. Bake until firm, about 30 minutes, and allow to cool slightly. Reduce oven temperature to 325. When the cookies are no longer hot to the touch cut them into 1” pieces. Begin at a 45 degree angle from the end of the log to achieve the traditional angular shape. As you cut, flip the cookies so the cut side is facing up. Sprinkle with sugar and bake until just beginning to brown.

Roasted Fig and Black Pepper Biscotti

Cut approximately 2-3 cup fresh figs in half, place on an oiled sheet pan, and roast at 350 until they are oozing a thick syrup and are about half of their original size .

Grind 1tsp black peppercorns and 1tps fennel seeds until smooth. Either use a spice grinder, a mortal and pestal, or a pepper grinder for both spices. Mix the spices into the dry ingredients, incorporate with wet ingredients, add figs, shape and bake.

Chocolate Hazelnut Biscotti

1/2 cup coarsely ground hazelnuts

1tsp anise seed

1/4 cup slivers best quality dark chocolate (optional)

Toast hazelnuts and anise seeds until slightly brown and aromatic. This is accomplished equally well on top of or inside the oven. Incorporate nuts and spices and chocolate into the wet ingredients.

Orange Almond Biscotti

½ cup toasted slivered almonds

1tsp almond extract

Zest of 1 orange

Toast almonds until slightly brown. Add orange zest and almonds to wet ingredients and proceed with basic recipe.

Homemade Creme Fraiche

•September 21, 2007 • Leave a Comment

Creme Fraiche 

I can see Matt approaching my side of the counter, pencil and paper in hand.  Today, for once, everything is under control. The tart’s cooling, the tuiles are baked, and my station is ready for service.

He leans over the counter. AND LAUREN, WHATS FOR DESSERT TODAY?

WARM APPLE TART TATIN WITH MAPLE CREME FRAICHE.

AND HOW DO YOU SPELL THAT? Pencil tapping.

I raise an eyebrow.  DEPENDS, HOW FRENCH DO YOU FEEL? 

NOT VERY. HOW DOES WARM APPLE TART TATIN WITH FRESH MAPLE CREAM SOUND TO YOU?

I’D ORDER IT.

GOOD. DONE. And he marches off to print the Daily Specials.


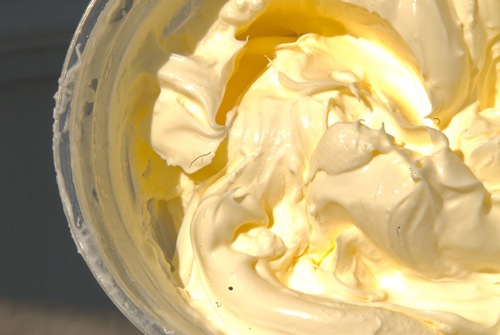
Creme Fraiche or Fresh Cream, however you wish to call it, has more depth and structure than whip cream and is especially nice as a counterpart to very sweet or very chocolate desserts. Creme Fraiche is also wonderful with savory dishes.  Add herbs and finish soups with a dollop, or use it between the layers of a potato gratin.  It is a great things to have around.  I always keep a batch in the fridge, both at the restaurant and at home.

To make Creme Fraiche simply make a mixture of 1 part cultured buttermilk to 3 parts heavy whipping cream, cover, and let sit at room temperature over night or until thick. Once your cream is the thickness you desire (I like mine to hold up a spoon) keep it in the fridge. It will last weeks if you don’t use it first. And once you have a culture started you can use it as a starter for your next batch, in the same proportions. Mix in maple, honey, lavender, herbs or whatever other variations you can think of after your cream is cultured.

(If you are interested, the culture you are growing is either Lactococcus or Leuconostoc, depending on your starter culture. Both are “cream cultures” and have three important qualities: they grow at room temperature, they produce only moderate acid during fermentation so your cream stays sweet, and they convert citrate, a component of milk, into a diacetyl, a compound that highlights the flavor or butterfat. (Thanks, Harold McGee. On Food And Cooking, p.49)

Upside Down Peach Pound Cake

•September 19, 2007 • 3 Comments

Peach Pound Cake 

I was standing on the side of the line, starving, watching the boys flipping fish and frying scallops when I noticed Noah standing next to me.

YOU DON’T HAVE TO TAKE MY ORDER, NOAH. TIM IS ALREADY MAKING ME AN AHI SANDWICH AS SOON AS HE GETS A CHANCE.  Tim hears me and looks up, tongs pinching green and yellow wax beans on their way to the plate.

IT’LL ONLY BE A SECOND–JUST LET ME GET THROUGH THESE TICKETS. He squints at the pieces of paper clipped on the inside of the window and points at me with his tongs. THREE CATFISH AND A LAMB BURGER AND YOU’RE UP.

I nod and notice Noah is still at my side.  He looks at me.

DID YOU MAKE THAT POUND CAKE, LAUREN?

YEAH. I feel myself getting slightly defensive. WAS IT ALRIGHT?

YEAH. IT WAS GREAT. IF WE WERE MARRIED I’D BE SO FAT.

I burst out laughing. Noah and I had never discussed marriage. In fact, we had never discussed anything.

Noah looked confused, and then worried.  I kept laughing.

THAT PROBABLY SOUNDED WEIRD. I DIDN’T MEAN…I’M SORRY…I JUST MEANT IT WAS REALLY GOOD.

I KNOW WHAT YOU MEANT. THANKS.

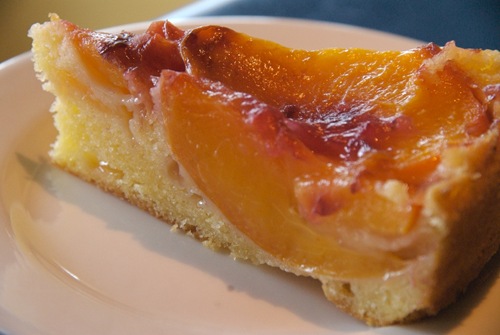
A piece of peach pound cake-yumm!

UPSIDE DOWN PEACH POUND CAKE

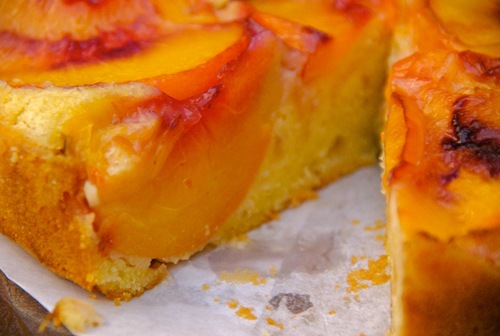
I love this cake for two reasons: It is very easy to make and forgiving of less than perfect measurements and oven temperatures AND you can use any kind of stone fruit or berry on the top, making it a perfect way to use up late summer fruit. Also, since it is not too sweet, it makes a wonderful brunch treat or coffee accompaniment.

If you decide to use berries in place of stone fruit I recommend cooking 1/2 cup of the fruit with 1/4 sugar and the juice of 1/2 lemon over medium heat until the berries burst or form a light syrup. Add 1 1/2 tbs potato starch to your fruit syrup and use it to coat the bottom of your greased spring-form pan before you cover it with fresh berries. This extra step will help you un-mold the cake more easily by creating a barrier between the pan and the batter that will try and seep through the berries and stick to the pan.

FOR THE CAKE

2 sticks butter, cut into 1″ cubes, and softened

1 cup sugar

3 large eggs plus three large eggs yolks

1 tsp vanilla

1 1/2 tsp milk or cream

zest of 1 lemon

1 1/2 cup sifted flour

In a standing mixer whip butter on medium speed until it is light and airy, about 3-5 minutes. Beat in sugar and whip for another 3 minutes.

Combine eggs, yolks, vanilla, lemon zest, and cream and gradually beat into creamed butter and sugar mixture.

Using a large spatula, gently fold in sifted flour, 1/2 cup at a time.

FOR THE FRUIT

Ripe end of summer bruised peaches work best because of their natural sweetness and acidity.

Pit the fruit by cutting it in half and removing the pit with the point of a knife. If your pit does not come out easily, your peaches are under ripe (or were when they were picked) and you should increase both sugar and lemon to taste to compensate for their lack of flavor.  There is no need to remove the skin unless it is broken and beginning to turn. Once the skin is cooked it will be indistinguishable from the flesh except for the bright color it adds to your cake

Cut your fruit into wedges and add the juice of one lemon; 1 tbs potato starch; 1/4 cup sugar, or less, if like me you prefer a natural fruit sweetness.  Toss lightly to combine.

Generously butter your 8″ spring form pan and dust with sugar. Arrange the peaches in an overlapping set of concentric circles that completely covers the bottom of the pan.

Scoop the cake batter into the pan in three places to make it easier to spread without disturbing your peaches or berries. Use wet fingers to spread the cake over the fruit so that it is completely covered. Firmly tap the cake pan against the counter to remove air pockets.

Bake at 375 for 35 minutes or until a knife inserted in the middle comes out clean.

Remove from the oven and run a knife around the mold. Loosen and remove. Let cool for 15 minutes, or until the cake is warm but not hot to the touch.

Place your serving plate on the cake and invert.  Before removing the bottom of the pan go around the edge with a blunt knife, gently applying upward pressure and inserting your knife deeper and deeper under the pan until it comes free.

Enjoy!

The Texas Wild Boar

•September 15, 2007 • 2 Comments

CAN I GET A SIGNATURE?Fresno Chillies

I looked up without moving my head. A tall woman in khaki shorts was pushing a pink invoice in my direction.

At that moment I was balancing on my left leg, body horizontal to the floor, right leg propping the refrigerator door open behind me.  The pose was something akin to a figure skater’s pre-jump wind-up, and the only way I could get heavy pans in the fridge when there was no one else to open the door.

With a quick switch of the right leg for the right shoulder I pushed the door open, stepped back, and hoisted the chocolate pot de creme to the top shelf, little ramekins clattering.

I shut the door, brushed my hands on my apron, and looked up.

YOU WANTED MY SIGNATURE?

She looked at me skeptically.

YES, PLEASE. RIGHT HERE, handing me the pink paper a bit sheepishly, as if she had caught me in the middle of an intensely private act.

WHAT AM I SIGNING FOR?

ITS YOUR MEAT ORDER.

She was wearing a white polo with “Fine Meats” embroidered on the right shoulder.

I felt a embarrassed.

WHAT KIND OF MEAT?

She took the pink slip out of my hand and brought it close to her face, studying the small type.

TODAY… ITS WILD BOAR, she said, handing me the slip again.

And I was hooked. REALLY…WHERE WAS IT CAUGHT? WHO HUNTS IT? DO YOU CONTRACT HUNTERS….but she cut me off with a wry smile.

ITS NOT THAT KIND OF WILD–I THING IT’S FROM A RANCH DOWN IN TEXAS. 

And then after a moment: BUT ITS KINDA WILD DOWN THERE.

YOU MEAN ITS “FARMED” WILD BOAR.

I GUESS YOU COULD SAY THAT. She handed me a pen.

I signed. She left. The next day we served Texas Wild Boar with Roasted Fresno Chillies, extra Wild on the side.

How to Identify a Good Fish and Reject a Bad One

•September 8, 2007 • 4 Comments

Fish

Take the fish and stick your nose in the hole where the head was. If you wish that you hadn’t done that, send the fish back. Run your finger along the blood line inside the belly, head to tail, and smell it. If you smell anything, send it back.

If your fish arrives with a head, examine the eye. The Japanese will tell you to judge freshness by the convexity of the ball. But the Japanese would never buy a headless fish, and we would. If the eye is round rejoice and touch the skin: A fish just from the ocean will ooze a slime clean like egg white; but a fresh fish can lack this if it is packed in abrasive crushed ice. If it is slimy rejoice twice and proceed.

If your fish is of the fatty spawning variety and gutted, pinch the belly between your thumb and forefinger. It should be thick, about an inch think, never less than a half, and it should be firm, too firm to roll back and forth to the left and right. It should feel substantial, rubbery and fleshy, like a big piece of string cheese. And the same glossy white color. A fish that passes the caliper test was healthy when it was caught, just beginning its fasting fight upriver. A fish that fails was at the end of its life and starving when it was caught. The belly fat is gone and so is the flavor. Send the fish back.

If your fish passes the belly fat test, put your finger at the creature’s tale. Run this finger along the belly towards the gills. Now look at your finger. If it is clean, your fish is fresh; it was recently caught; it has not been out of the water very long. If on the other hand, you see more than one or two scales, or worse, spy them jumping off of your fish’s belly and are now covered, face, arms, and apron, in glittering scaly sequins, your fish is old. Dead too long. No thank you.

#2 Heirloom Tomato Soup

•August 30, 2007 • 5 Comments

DSC_0004

In the early-morning market Dominica and John, Pam and Yung sort arrange the ripe peaches, heirloom tomatoes, blueberries,
blackberries, raspberries and melons into row after row of dazzlingly
uniform fruit.  Some days they save me the rejects.

This morning John came to the kitchen door with a Styrofoam box full
of bruised tomatoes—big beautiful green zebra, yellow lemon and deep
red fruits that greengrocers won’t sell because of the very bruises
that herald the height of their flavor.

LAUREN, HONEY, I BROUGHT YOU A CASE OF #2 HEIRLOOMS. He was out of
breath and there was a slight huffing in his faded-Brooklyn
accent.  John is no young man and Matt’s is on the third floor.  The
fact that he had carried the tomatoes up himself meant that he cared
a lot about those tomatoes, or me, or both.

I put down my whisk and went to examine John’s gift. The aroma made
me smile.  There were a few dark bruises, and soft spots, but these
tomatoes smelled wonderful, tangy and salty and tart like mint and
lemon and smoke.

I’ll ROAST THEM FOR SOUP—THEY’RE PERFECT.

SEE, I REMEBERED YOU WANTED THEM—BRING ME DOWN A CUP OF SOUP LATER,
EH? A wink, and he was gone.

****

#2 Heirloom Tomato Soup

Whether from your greengrocer, garden or refrigerator, make sure to
use fruit so ripe that it has begun to soften and has a few dark
spots. Although you should cut them out, their presence means that
you are using the fruit at the very peak of its ripeness.

Preheat your oven to 425-450.

Cut your tomatoes into quarters, or smaller if you are working with
very large fruit, and place them cut side up on a sheet pan.
Coat liberally with olive oil and kosher salt on the flesh side of
the fruit and then turn them over so that the skin is facing up. Oil
and salt the skin side.

Roast for 15-20 minutes or until the tomatoes are wilted and
releasing clear liquids in the pan. Roasting the tomatoes skin side
up makes it easy to peal the skins off after you take them out of the
oven if you prefer.  Personally, I love the skins, for their texture
and deep flavors.  Depending on your preference and equipment, you
can either remove the skins after you take the fruit from the oven,
or leave them on and incorporate them into the soup.

Blend the roasted tomatoes until smooth. I like to use an emersion
blender because you don’t have to wait for the fruit to cool. A
regular blender or food-processor works fine, but be sure to cover
the lid and base with a cloth if your tomatoes are still hot.

Taste the soup. It almost always needs more salt and a dash of sherry or another light vinegar to balance the flavors.
Serve warm  or cold, topped with a chiffonade of basil and good olive
oil.  Either way, I like a bubbling cheese-topped crostini on the side.

40 Little Cakes

•August 21, 2007 • 2 Comments

Some days I feel like I am masquerading as a professional. Today is one of those days.  Yesterday morning, as I was leaving the restaurant, Matt signaled me over.

LAUREN, I FORGOT TO ASK YOU IF YOU COULD MAKE 40 DESSERTS FOR FRIDAY. WE’RE HOSTING A REHERSAL DINNER FOR A FRIEND OF MINE.

I lack the ability to say “no” at the right moments, and instead, what came out of my mouth was:

SURE, WHAT DO THEY WANT?

OH, ANYTHING. WHATEVER YOU MAKE WILL BE FINE. 

Matt’s greatest virtue, and possibly the key to his success and evident happiness, is his unflappability. He lives in a reassuring world were everybody does their best, and their best is the best they can do, and therefore good enough. It is in no way a defeatist attitude, but one that exudes confidence.  The problem is that sometimes confidence can negate the need for advance planning.

 ***

I worried all night and got up early the next morning. And when I got to work, I made 40 little cakes, not a single one to spare. They turned out to be bitter-sweet chocolate and orange.  There weren’t any extras to try, but they smelled good.

In the early morning quiet of the restaurant I begin to understand Matt’s calm: however the cakes turnout, whatever I decide to make, and however they like it, it will still be calm and quiet here in the early morning of tomorrow.  Good or bad you get to try over and over again.

Bittersweet Chocolate Cake with Candied Orange and Creme Fraiche

Restaurant baking has several constraints that home bakers flaunt and enjoy without appreciating: 1) Home bakers can generally reach their oven without peril, and 2) they can set the temperature of their oven to suit their recipe. 

The restaurant kitchen is not well set-up for plating warm desserts. Our one and only oven is set at 450 F during service, positioned at the opposite end of the 3 foot wide kitchen occupied by 4 chefs, and burns all but the sturdiest of desserts before you can say “order in.” If this were not the case I would have been the first to make a warm chocolate cake, and that is what I recommend you do, since it certainly won’t mean crossing paths with multiple hot pans and sharp knives and sweaty white coats.  As such, the recipe that follows is not the one that I made, but the one that I would have made, in the best of all possible worlds.

Recipe:

I added the zest of one orange, grated on a microplane, to the melted chocolate and butter mixture, while the mixture was still in the baine marie and hot enough to release the orange oils from the zest.

Individual ramekins, buttered and dusted in coco-powder (so that you cannot see any ugly unbaked flour on the top of your rich chocolate cakes) work, but buttered ring molds on a silpat lined sheet pan work better. I  managed to successfully un-mold all 40 ramekins without any casualties, but I had my breath held the whole time, and I believe luck intervened. I would’ve used ring molds but we don’t have any, and they are pricey.  I complained about this to a friend who bakes for a neighboring restaurant and she suggested I use tuna cans, well washed, with both the top and bottom cut out. Brilliant.


Candied Orange Garnish

Garnishing and plating are more luxuries that the home baker does not appreciate. When you bake professionally, you usually arrive early and leave before service, hopeful, but never knowing for sure if your desert was carefully composed or slapped on the plate, drenched in the ubiquitous  mint & coulis 1-2 combo, and thrown out the window without the lovely little orangettes you spent all that time making, and which, above all, add not only charm, but flavor.

***

Take a ripe orange and press one side down hard on the counter. This should flatten the side and make it easier for you, with a sharp knife, to cut a fairly rectangular patch of zest from the orange. Try to avoid excess pith because you will just have to cut it off later; and it is harder then than now. Repeat until you have removed all of the zest. I know some who like to use a potato peeler for this job. I do not, but if you don’t like, or don’t have very sharp knives, it works fairly well, just don’t press too hard or you will end up with tons of pith.

Take your oranges pieces and cut them into 1/4 inch wide match sticks. Place them in a small pan of boiling water. Boil for 5 minutes or until the water becomes orange and drain.

Bring another pan to boil, with equal cups water and sugar (simple syrup) and add the pieces of zest to the mixture. Boil gently until the zest becomes transparent and the syrup sticky.

With tongs place the orangettes on a wire cooking rack with newspaper underneath it, as the syrup will drip. When they are dry you can store them in a Ziploc between wax paper, dip them in chocolate and serve them with a Grand Marnier as a dessert in its own right, or take two and cross them over your warm little chocolate cakes, which is what I did, to make sure they weren’t forgotten.

Creme Fraiche

Can either be bought or made. If you would like to make it, which is the more tasty and economical choice, simply make a mixture of 1 part cultured buttermilk to 3 parts heavy whipping cream, cover, and let sit at room temperature over night. Grow lovely, tasty, bacteria. Grow!

Special

•August 7, 2007 • 1 Comment

LAUREN, WHAT’S THE SPECIAL?

Matt leans over the counter, pen in hand, ready to write.

I look at my almond cake, still in the pan and so hot that the cherries are on top are bubbling. And then at the clock: 20 minutes until service. The cake does not look like what I expected from the recipe, but flatter, spongier, and more difficult to unmold. And it is the moment of truth; Matt wants to print the menu.

JUST A SECOND. I MADE AN ALMOND CAKE BUT IT LOOKS LIKE IT MIGHT BE STUBBORN; LET ME SEE IF I CAN UNMOLD IT.

Matt looks a little skeptical, a tad amused, a bit annoyed, and taps his pen. I lift up the cake from the bottom, and like a dream it comes clean of the pan with such ease that I can he thinks I was spoofing at the prospect of disaster, or showing off. I was doing neither, and I am genuinely relieved. Though still flatter than expected the now compliant cake is quite lovely, soft yellow, deep red, with the scent of warm almonds.

“ALMOND CAKE WITH CHERRIES”, I say, newly confident, and cut a piece to sample.

NO, CALL IT “RUSTIC ALMOND CAKE WITH BLACK CHERRIES AND CHANTILLY CREAM”

What difference a name makes! Matt nods, and scribbles, and then reaches for the piece I set in front of him, and smiles. Then he reaches again.

***

I found this recipe on Orangette last night, and tweaked it by substituting cherries for apricots and adding almond extract to the batter. I added the extract because nothing is worse than and unalmondy almond cake and the almond flavor we have come to expect is actually a flavor component in peach pits, which the French have been adding to their almond paste for centuries and which we now know as almond. I have nothing against apricots, and had in fact planned on going down to Frank’s to get some for the recipe, but looked at the clock, my to do list, and the cherries Tim was using to make a gastrique, and decided a little switcheroo was in order. ( I stole the pitted ones when he wasn’t looking.) Tomorrow, I plan on using apricots, and carmelizing them with my blow torch when the cake comes out of the oven and, if time permits, making a reduction with sage a honey to spruce up the plate.

Preheat your oven to 350.

1/3 cup blanched almonds, ground finely.

2/3 cup flour

1t baking soda

2/3 cup sugar

pinch of salt

8 tb butter, softened

1t almond extract

2 large eggs.

Like always, mix dry ingredients, cream wet ingredients and combine the two as gently as possible. The batter is thick and covers the pan only scantly if you coax it with your fingers (which I suggest wetting slightly to keep the batter from sticking). Place whatever fruit you use cut side up so the extra juices condense and thicken rather than make a dark soggy spot on your cake. Orangette suggests wrapping the bottom of your removable 8 or 9″ pan in parchment paper, and despite my near panic, the technique does work. Every oven is different–Its done when it looks and feels done: just beginning to golden and springy to the touch. At the restaurant we use a convection oven which effectively cooks around 50 degrees hotter (due to better air circulation) than the temperature reads. Needless to say, I have burned things. Its better to get to know your oven and to trust your nose.